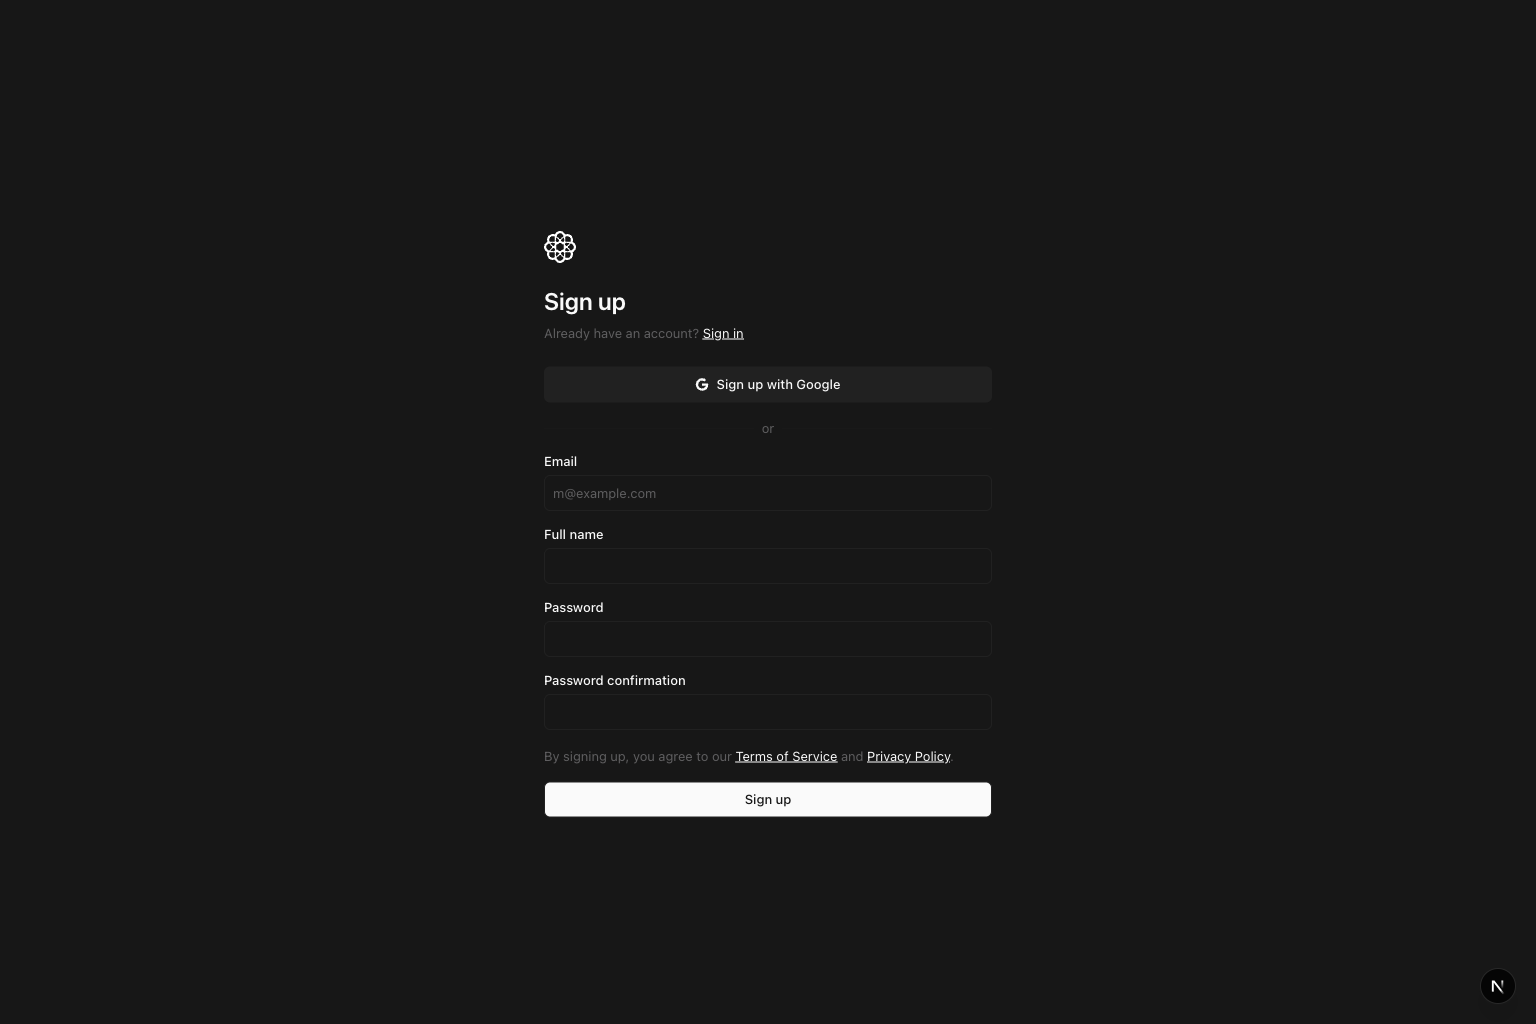
 Choose either:
* `Sign up with Google`
* Email + password sign-up
After successful registration, you will continue into organization setup.
## Step 2: Create your organization
An **organization** is your team workspace in Atomic AGI. It contains:
* Projects
* Members and permissions
* Shared billing and settings
Choose either:
* `Sign up with Google`
* Email + password sign-up
After successful registration, you will continue into organization setup.
## Step 2: Create your organization
An **organization** is your team workspace in Atomic AGI. It contains:
* Projects
* Members and permissions
* Shared billing and settings
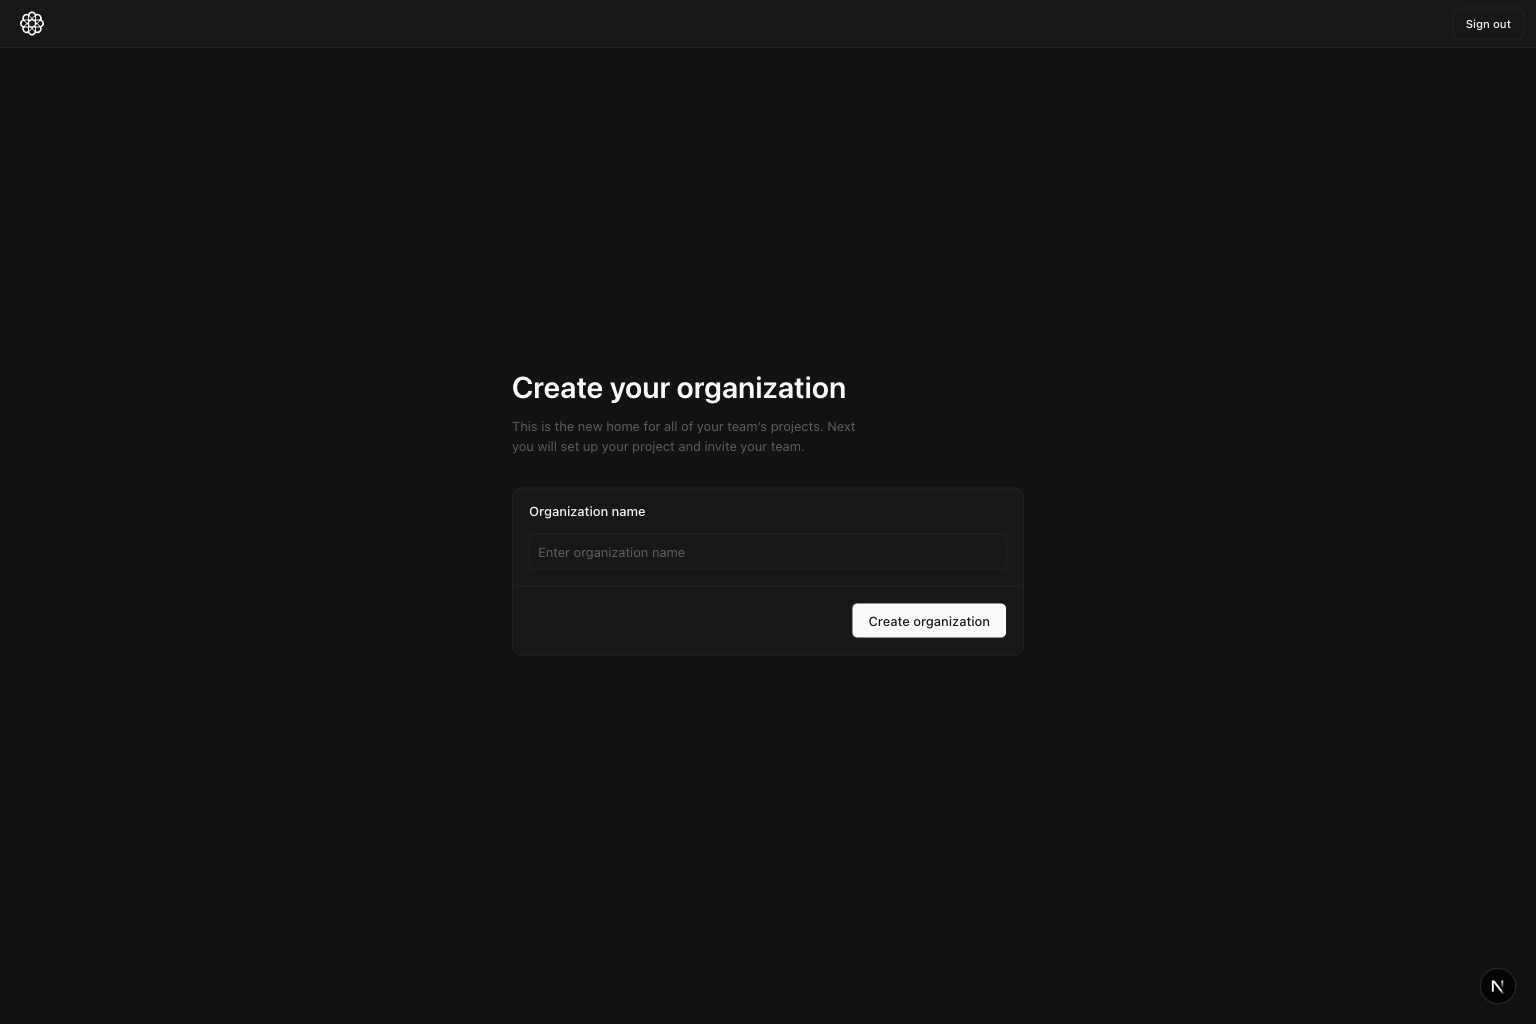 Enter your organization name and click `Create organization`.
## Step 3: Enter your project details
Enter your organization name and click `Create organization`.
## Step 3: Enter your project details
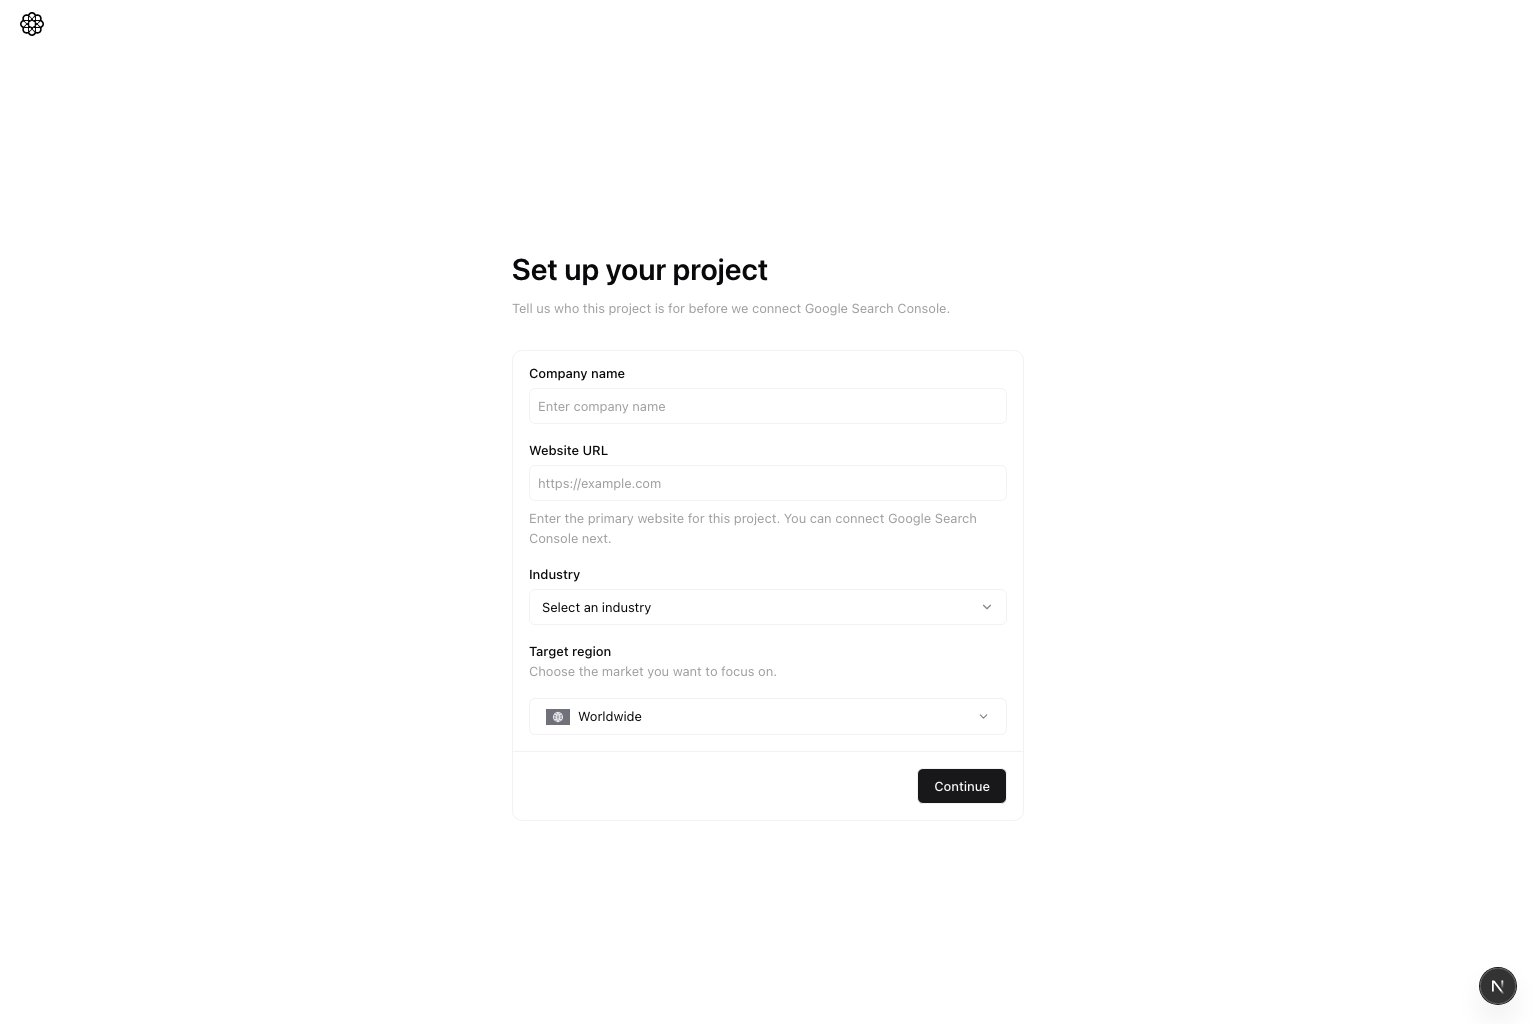 After organization creation, you will move to project setup automatically.
Enter:
* `Company name`
* `Website URL`
* `Industry`
* `Target region`
The Website URL is required. Enter the full URL, including `http://` or `https://`, such as `https://example.com`.
Atomic saves only the website host as the project domain. Paths, query parameters, and fragments are removed, `www` is
normalized away, and the saved value always uses `https://`. For example, `http://www.example.com/blog?ref=setup` is
saved as `https://example.com`.
Select `Continue`. On the next page, continue to Google Search Console and use a Google account that has access to the
website you want to connect.
## Step 4: Select your Google Search Console property
After organization creation, you will move to project setup automatically.
Enter:
* `Company name`
* `Website URL`
* `Industry`
* `Target region`
The Website URL is required. Enter the full URL, including `http://` or `https://`, such as `https://example.com`.
Atomic saves only the website host as the project domain. Paths, query parameters, and fragments are removed, `www` is
normalized away, and the saved value always uses `https://`. For example, `http://www.example.com/blog?ref=setup` is
saved as `https://example.com`.
Select `Continue`. On the next page, continue to Google Search Console and use a Google account that has access to the
website you want to connect.
## Step 4: Select your Google Search Console property
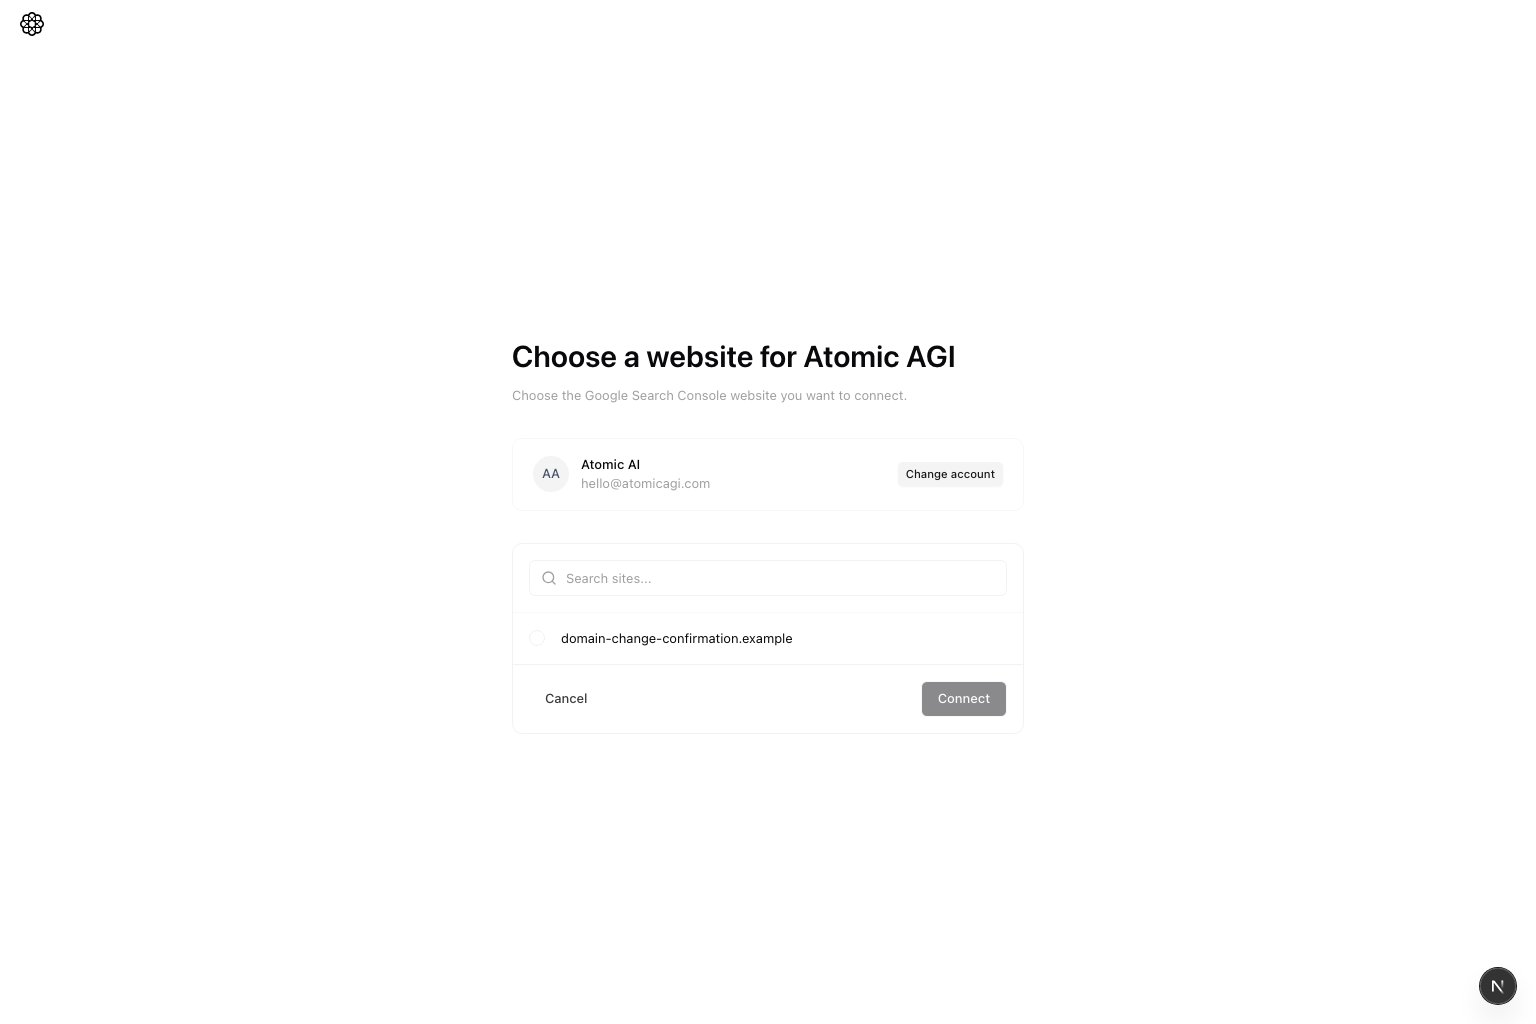 Choose the GSC website you want to track. Atomic compares its hostname with the Website URL saved in Step 3.
* If the hostnames match, select `Continue`.
* If the hostnames differ, the button changes to `Connect and change domain`.
Atomic compares hostnames rather than complete URLs. For example, `https://www.example.com/page` and
`sc-domain:example.com` are treated as the same website.
### Confirm a different GSC domain
Choose the GSC website you want to track. Atomic compares its hostname with the Website URL saved in Step 3.
* If the hostnames match, select `Continue`.
* If the hostnames differ, the button changes to `Connect and change domain`.
Atomic compares hostnames rather than complete URLs. For example, `https://www.example.com/page` and
`sc-domain:example.com` are treated as the same website.
### Confirm a different GSC domain
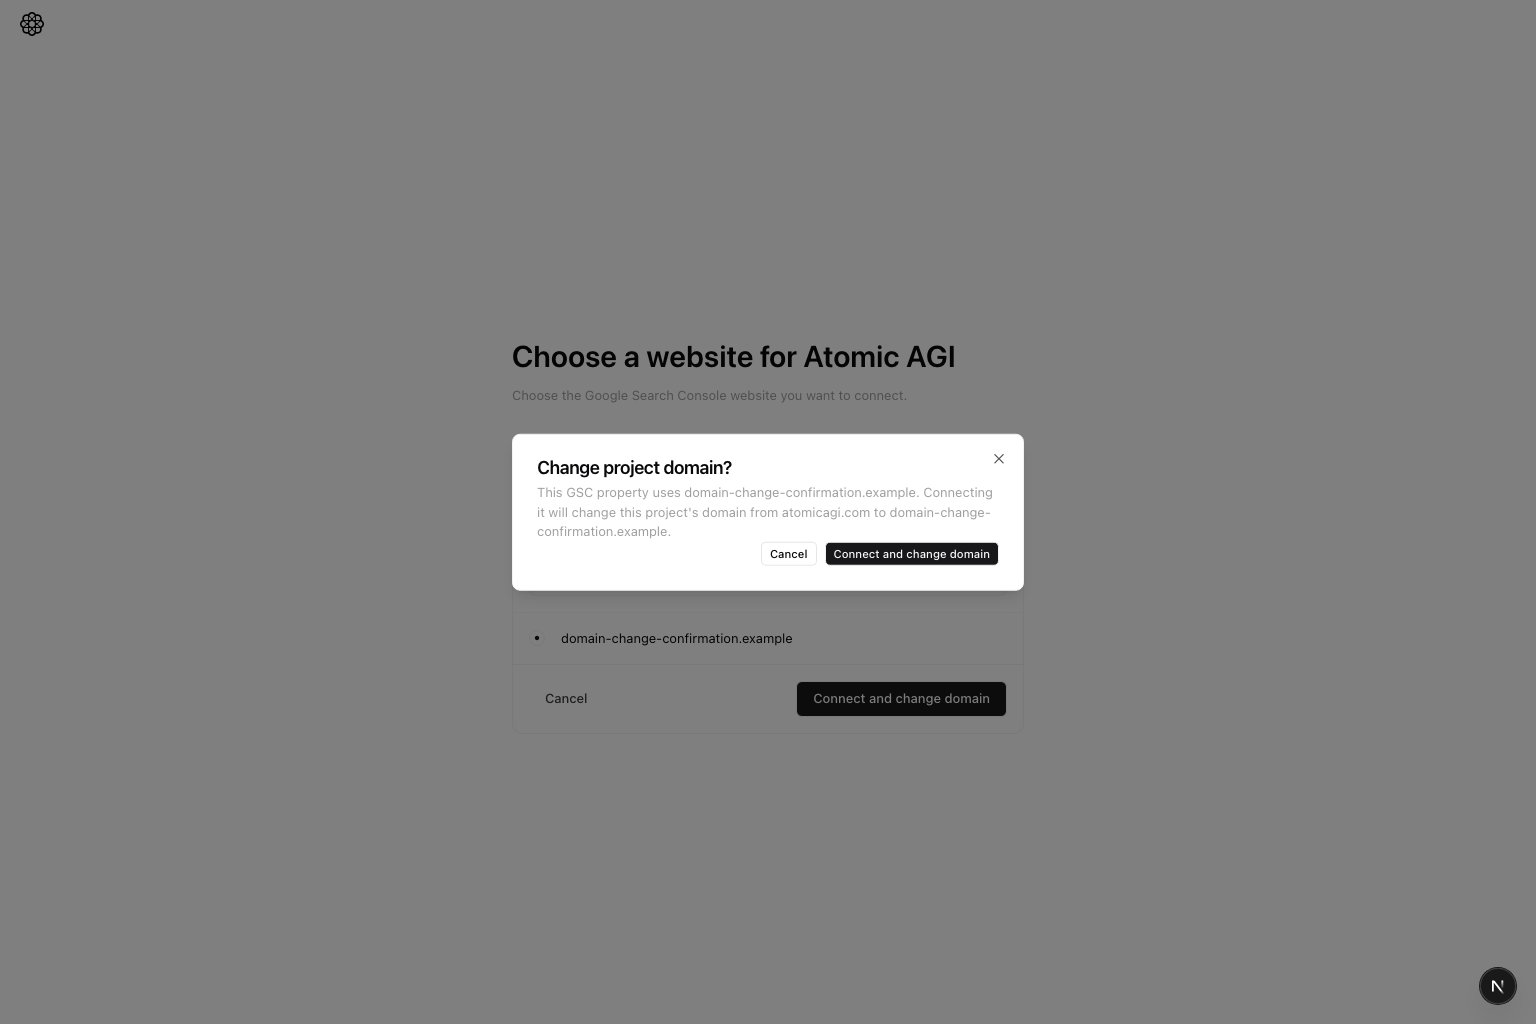 When the hostnames differ, Atomic shows `Change project domain?` before connecting the GSC website. Review both domains,
then choose one action:
* `Cancel` keeps the current project domain and returns you to the website picker without connecting the selected site.
* `Connect and change domain` connects the selected GSC website and replaces the project domain with that website.
When the hostnames differ, Atomic shows `Change project domain?` before connecting the GSC website. Review both domains,
then choose one action:
* `Cancel` keeps the current project domain and returns you to the website picker without connecting the selected site.
* `Connect and change domain` connects the selected GSC website and replaces the project domain with that website.
Important: If the expected site is missing, verify it first in Google Search Console, then reconnect.
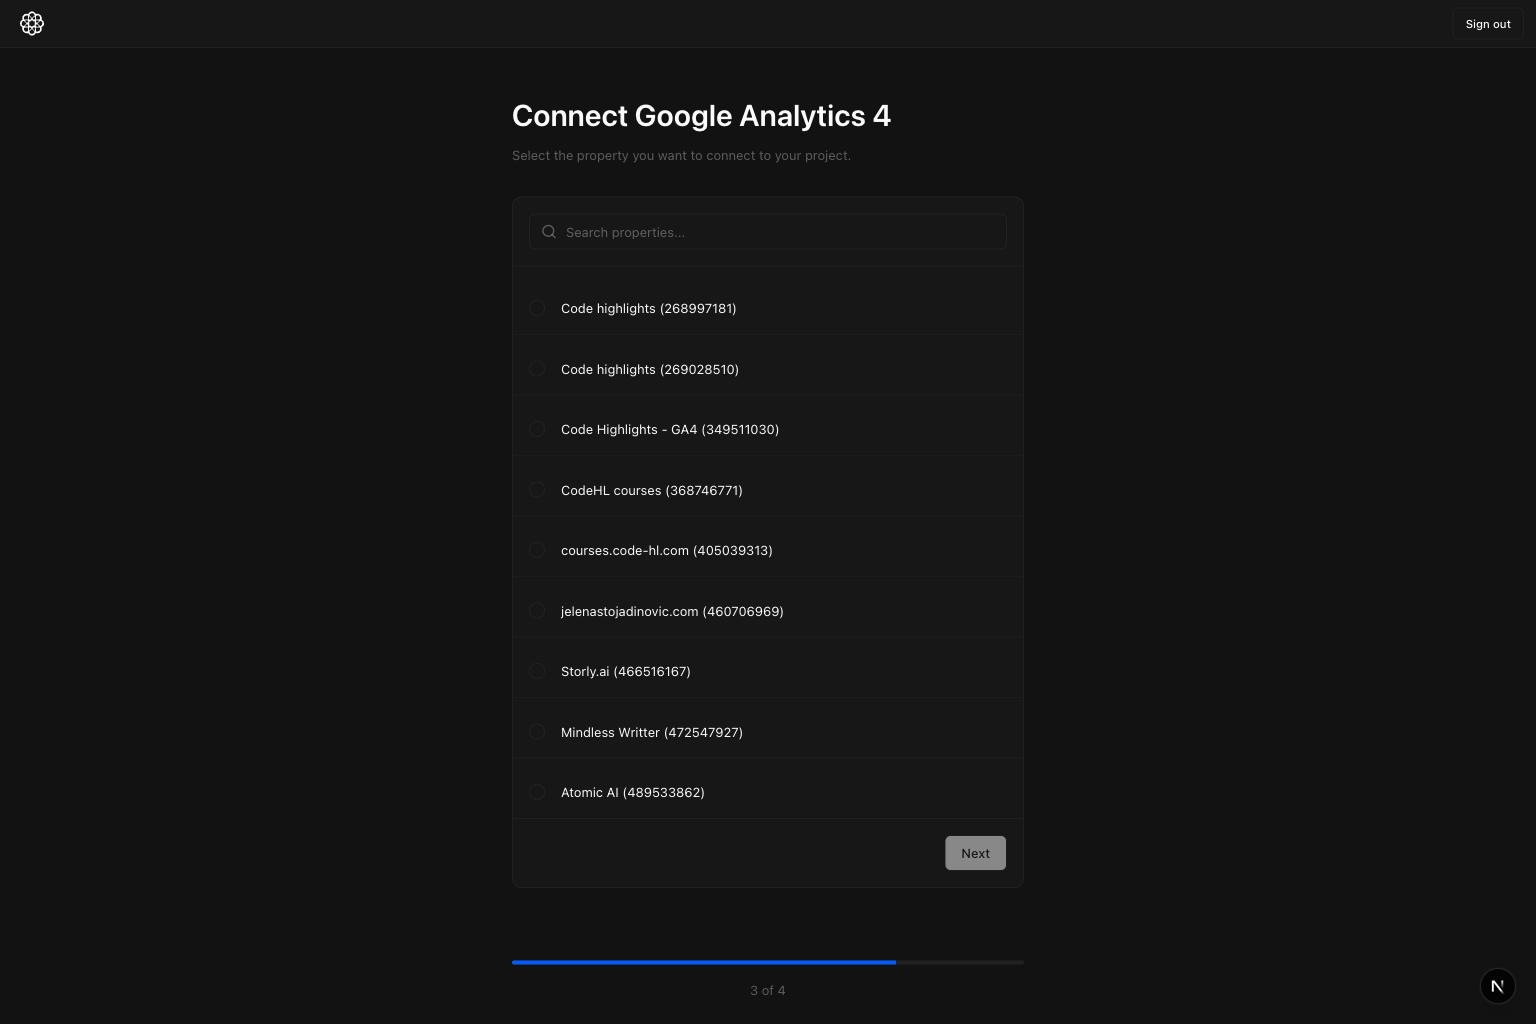 This GA4 step appears right after GSC selection. Choose the GA4 property for the same website/project and click `Next`.
## Step 6: Confirm the correct GA4 property and continue
This GA4 step appears right after GSC selection. Choose the GA4 property for the same website/project and click `Next`.
## Step 6: Confirm the correct GA4 property and continue
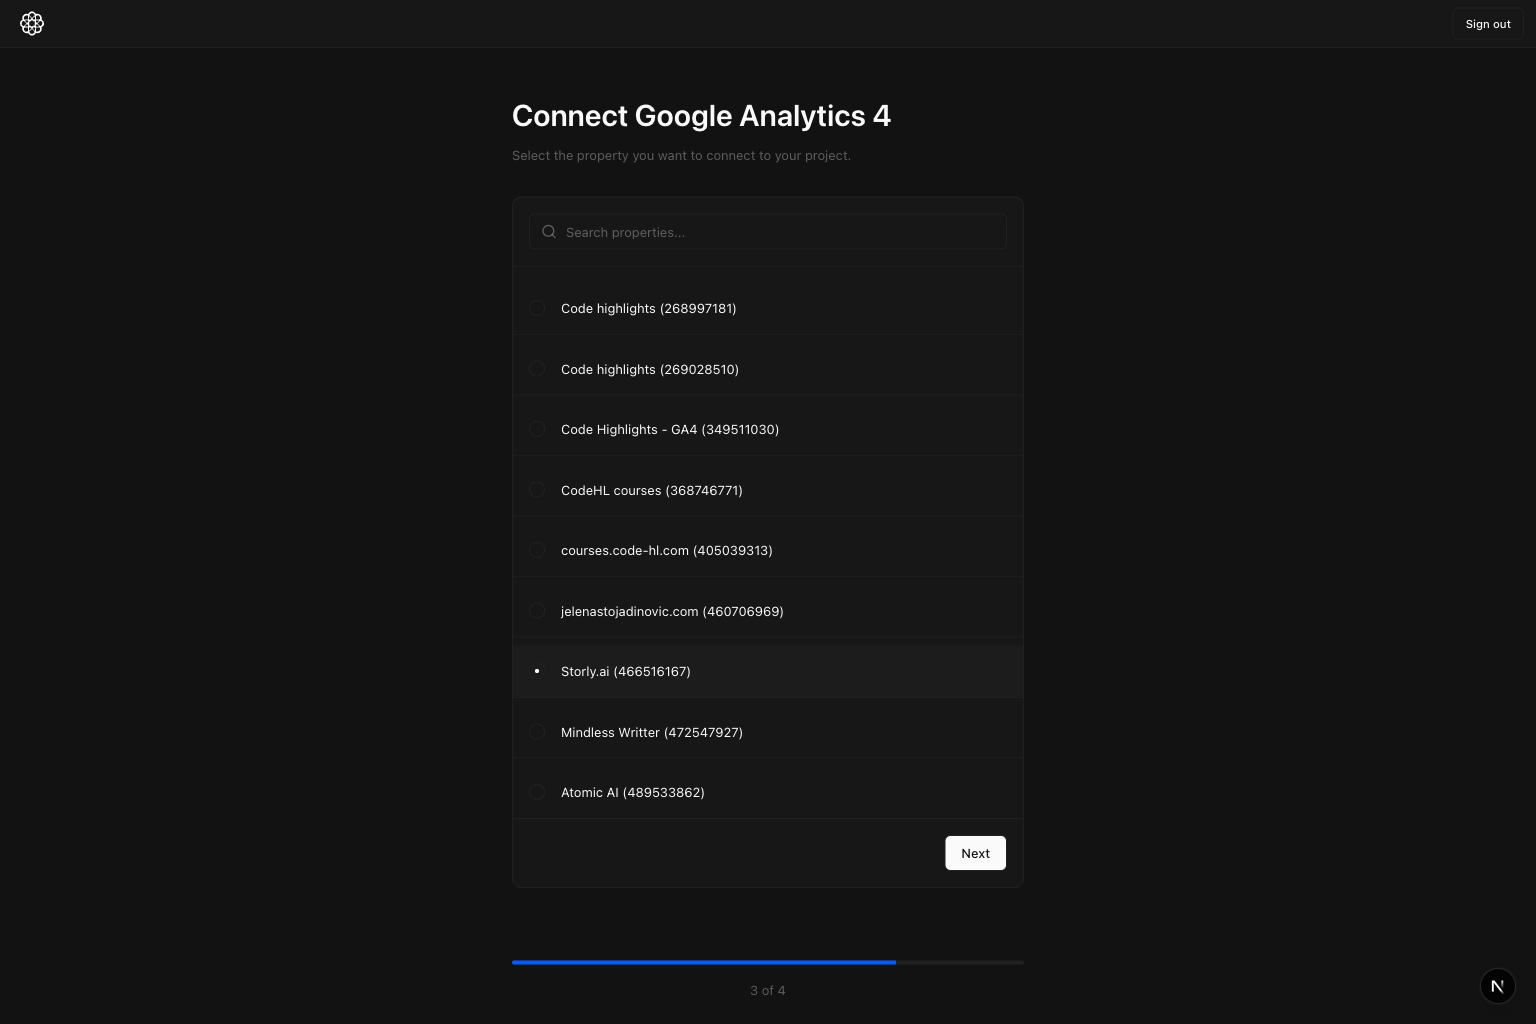 The screenshot shows one example selection. In your workspace, select your own GA4 property.
Keep GSC and GA4 from the same business/project to avoid reporting mismatch.
## Step 7: Select your conversion event(s) and connect
The screenshot shows one example selection. In your workspace, select your own GA4 property.
Keep GSC and GA4 from the same business/project to avoid reporting mismatch.
## Step 7: Select your conversion event(s) and connect
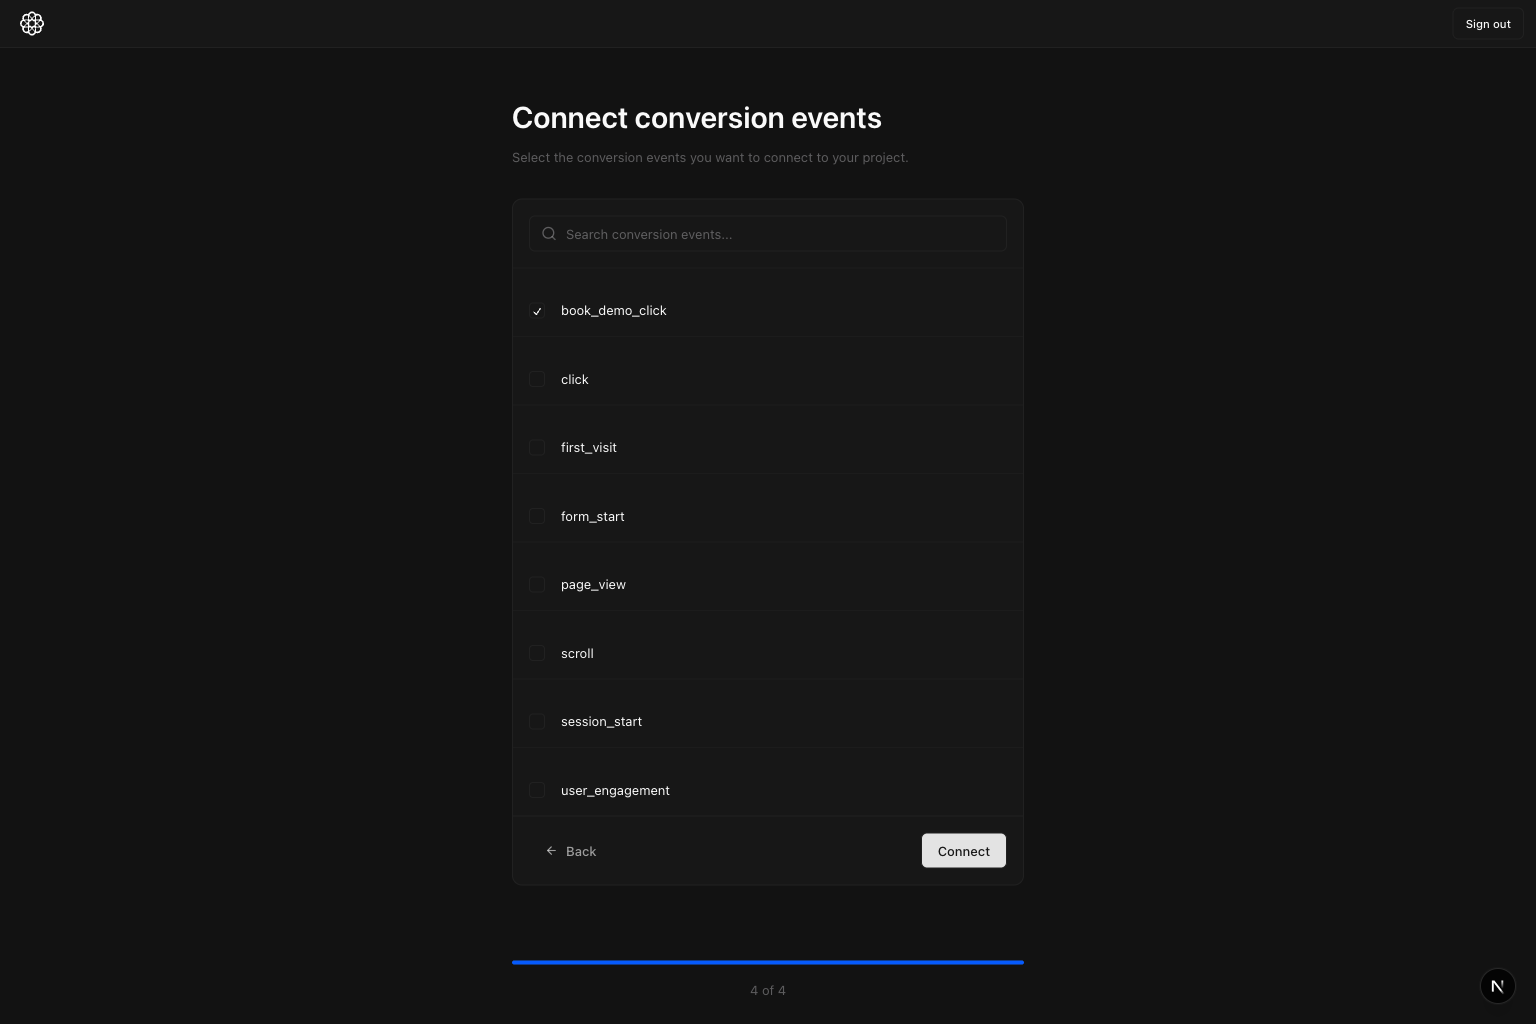 Choose the conversion event that represents a real business outcome in your project, then click `Connect`.
The screenshot shows `book_demo_click` as an example.
Examples:
* `book_demo_click`
* lead form submit
* trial start
## Initial setup complete: what should be connected
At this point, your onboarding setup is done when all three are connected:
* Google Search Console
* Google Analytics 4
* Conversion events
## Where to go next
AI prompts are the next phase after initial setup.
Next, go to [AI Search Prompts](/data/ai-search/prompts) and add the prompts you want to track.
Choose the conversion event that represents a real business outcome in your project, then click `Connect`.
The screenshot shows `book_demo_click` as an example.
Examples:
* `book_demo_click`
* lead form submit
* trial start
## Initial setup complete: what should be connected
At this point, your onboarding setup is done when all three are connected:
* Google Search Console
* Google Analytics 4
* Conversion events
## Where to go next
AI prompts are the next phase after initial setup.
Next, go to [AI Search Prompts](/data/ai-search/prompts) and add the prompts you want to track.
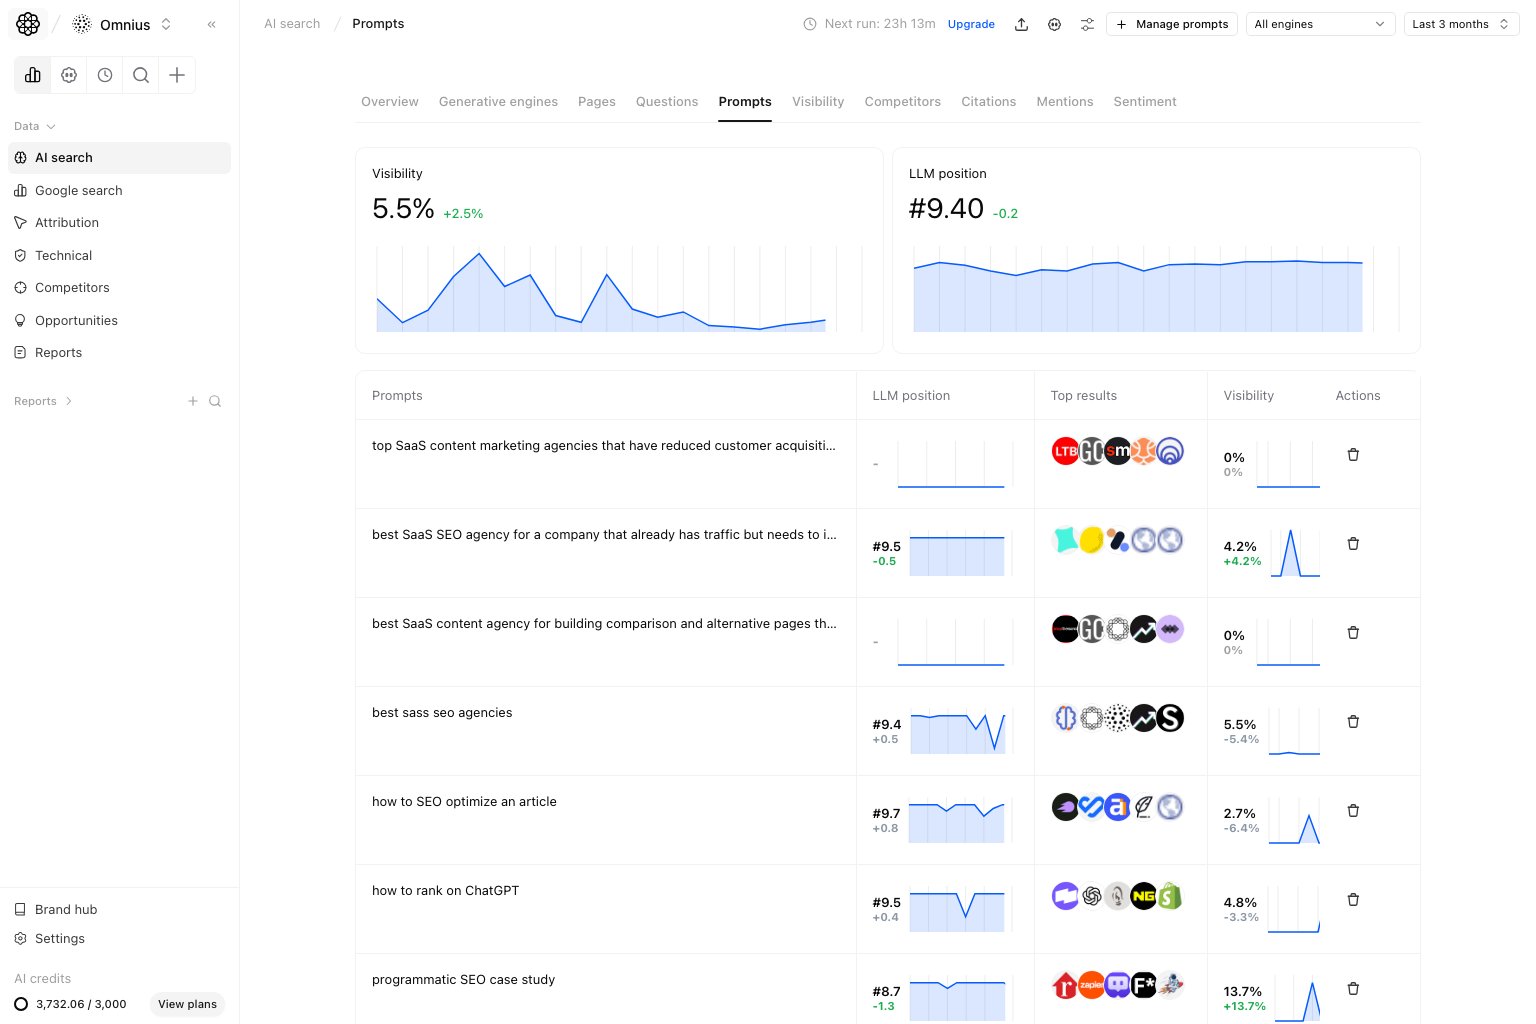 Use prompts across 3 intent layers:
1. Awareness: broad discovery questions.
2. Comparison: alternatives and evaluation questions.
3. Decision: high-buying-intent questions.
Continue with:
* [AI Search Prompts](/data/ai-search/prompts)
* [Project Data Sources](/settings/project/data-sources)
Use prompts across 3 intent layers:
1. Awareness: broad discovery questions.
2. Comparison: alternatives and evaluation questions.
3. Decision: high-buying-intent questions.
Continue with:
* [AI Search Prompts](/data/ai-search/prompts)
* [Project Data Sources](/settings/project/data-sources)