

Questions this page should answer
- How do I connect my AI agent with OAuth?
- Which MCP endpoint should my client use?
- When do I need a personal access token?
- How do I confirm tools are available in my client?
Before you connect
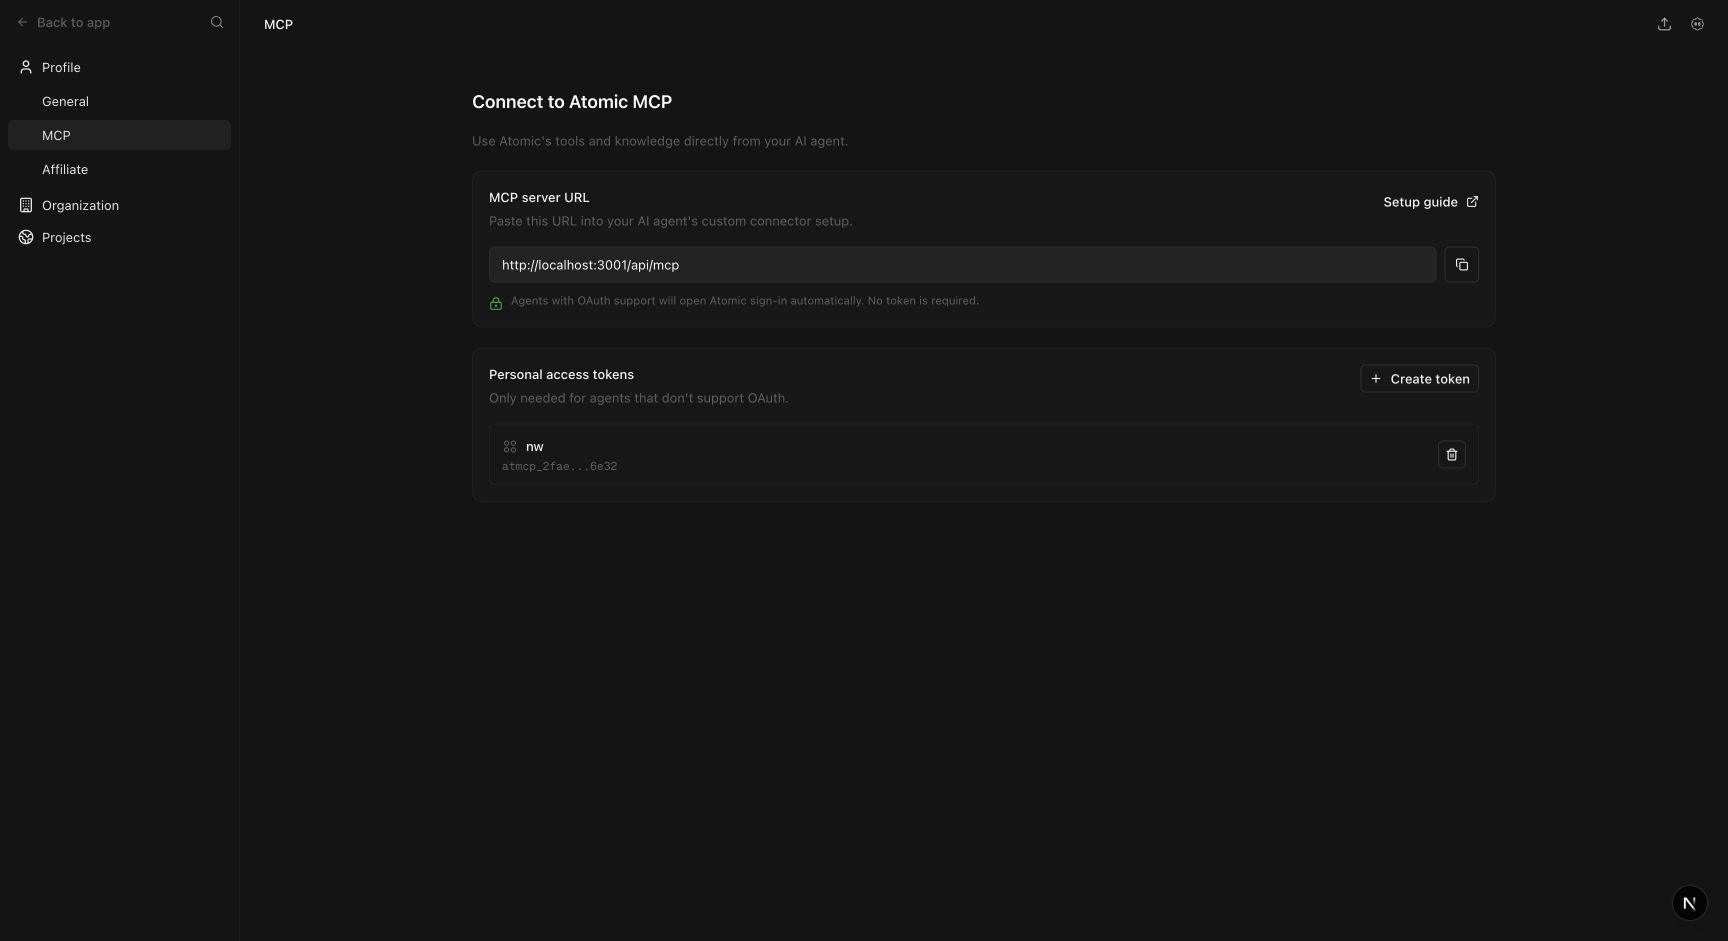
- In Atomic, open
Profile settingsand selectMCP. - Use the MCP endpoint:
What this page gives you
- Your Atomic MCP endpoint.
- A copyable server URL used by OAuth-enabled custom connectors.
- Personal access token creation and revocation for clients without OAuth.
- The configuration pattern for other remote HTTP MCP clients.
Important: If you need a personal access token, treat it like a password. Store it in your client config or secret manager, not in shared docs or chat threads.
How project access works
OAuth connections and personal access tokens inherit your user permissions. They cannot access projects you cannot already open in Atomic, and they cannot use tools for projects below the Starter plan. You do not need to put a project id in your client configuration. When a tool runs:- Atomic uses the only accessible project automatically when your account has access to one project.
- If your account has access to multiple projects, Atomic returns a project chooser with each project id, name, domain, and workspace.
- Ask the AI client to use the right project and rerun the tool with
projectIdin the tool arguments.
Cursor
Cursor can connect directly to Atomic’s HTTP MCP endpoint. Open Cursor MCP settings and add this server to yourmcp.json:
atomic-ai MCP server in Cursor. The tools list should load without any project-specific header.
Claude custom connector
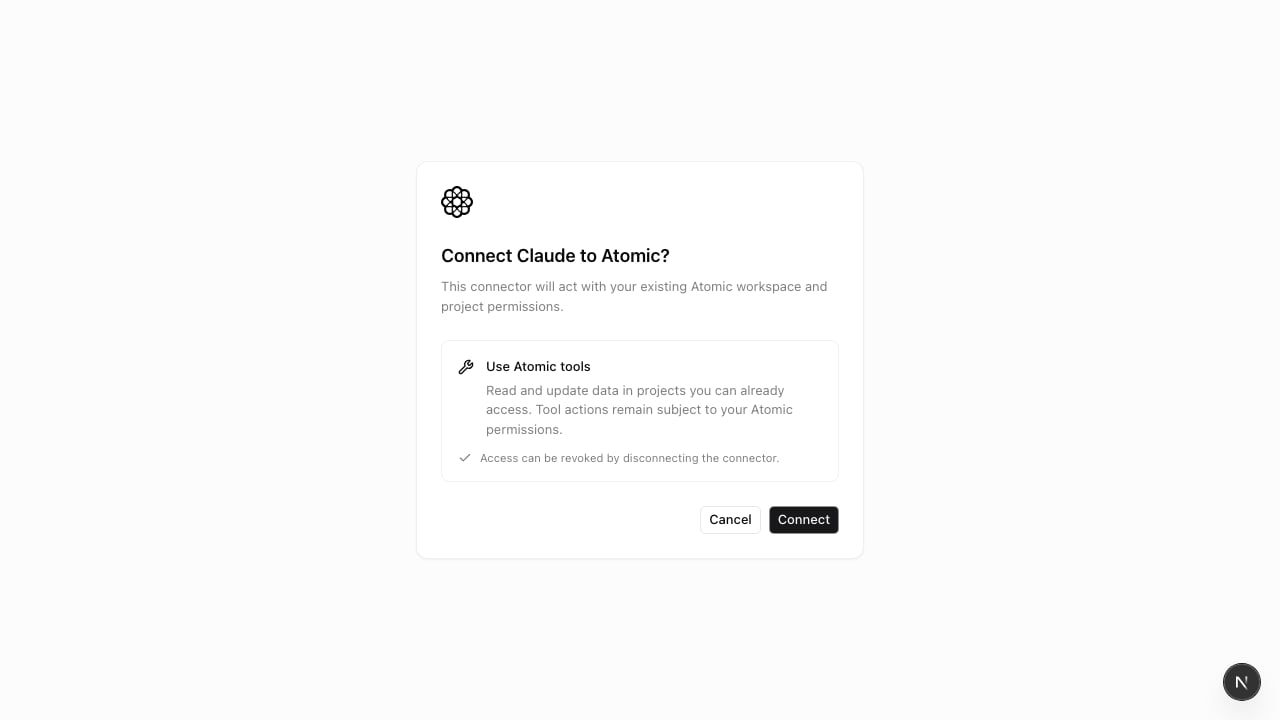
Claude and Claude Desktop can connect directly to Atomic using the remote custom connector flow. You do not need to paste an MCP token or configure OAuth client credentials.- In Claude, open
Settings>Connectors. - Select
Add custom connector. - Enter
Atomic AIas the name. - Enter the remote MCP server URL:
- Leave the optional OAuth Client ID and OAuth Client Secret empty.
- Select
Add, thenConnect. - Sign in to Atomic and approve the requested tool access.
ChatGPT custom app
ChatGPT can connect to Atomic through an OAuth-enabled custom MCP app. You do not need to create or paste a personal MCP token.- Enable developer mode in ChatGPT.
- Open
Settings>Appsand create a custom app. - Enter the Atomic MCP endpoint:
- Choose OAuth authentication and let ChatGPT register its public client automatically.
- Sign in to Atomic and approve the requested tool access.
Codex
Codex can add Atomic as a remote MCP server and authenticate through OAuth:Claude Desktop local configuration
For clients that use Claude Desktop’s localclaude_desktop_config.json rather than remote custom connectors, use mcp-remote to bridge to Atomic’s HTTP MCP endpoint.
Add this server to ~/Library/Application Support/Claude/claude_desktop_config.json on macOS:
Claude Code
Claude Code can add Atomic as a remote HTTP MCP server from the terminal:atomic-ai is connected and that tools are available.
Other MCP clients
Native and desktop MCP clients can use Atomic OAuth when they support dynamic client registration, authorization code flow with PKCE, and an HTTP loopback callback onlocalhost, 127.0.0.1, or ::1. Atomic validates and stores the exact registered callback URI.
Clients without OAuth support can use a personal bearer token:
Use Atomic as a remote HTTP MCP server when the client supports HTTP MCP:
mcp-remote with the Claude Desktop pattern.
Test the connection
You can test the token and endpoint withcurl:
tools array.
Quick setup checklist
- Choose your AI agent on the Atomic MCP page.
- Add the Atomic endpoint in your client and complete OAuth sign-in.
- Restart or refresh the MCP client.
- Confirm the Atomic tools list appears.
- Run a harmless read-only tool first.
- If asked to choose a project, pass the returned
projectIdon the next call.
Troubleshooting
The client shows no tools
Check that the MCP token is active, the endpoint ends with/api/mcp, and the authorization header starts with Bearer .
Claude Desktop says the config is invalid
Use thecommand and args format with mcp-remote. Claude Desktop does not accept the direct url and headers format used by Cursor.
Claude custom connector does not open Atomic sign-in
Confirm that the connector URL is exactlyhttps://app.atomicagi.com/api/mcp and that the optional OAuth Client ID and OAuth Client Secret fields are empty. Remove and add the connector again if Claude cached a failed setup attempt.
The tool asks you to choose a project
Choose the project by name or domain. The AI client should call the tool again with the returnedprojectId in the tool arguments.
A token was shared by mistake
Revoke it fromProfile settings > MCP immediately and create a new token.
Keep in mind
- MCP tokens inherit your user permissions.
- Claude custom connectors use OAuth and do not require a manually created MCP token.
- ChatGPT custom apps and standards-compliant native MCP clients can use OAuth without a personal MCP token.
- Tokens do not grant access to projects you cannot open in Atomic.
- Project selection is explicit when your account can access multiple projects.
- Revoke old tokens when you stop using a client.